22 Backyard Outdoor Shower Ideas for Refreshing Bliss
A refreshing outdoor shower can turn an ordinary backyard into your favorite place to unwind. From warm wooden enclosures to lush tropical retreats, the right design makes every rinse feel a little more special.
These backyard outdoor shower ideas offer inspiration for creating a beautiful, practical space that fits your home, garden, and budget. Whether you want a private corner for rinsing off after swimming, a simple DIY setup for summer, or a spa-inspired retreat surrounded by greenery, there is a design worth exploring.
The best part? You don’t need a huge backyard to make it work. Thoughtful material choices, smart privacy screens, and proper drainage can make even a compact patio feel inviting. I’ve noticed that coordinating a few natural textures, such as wood, stone, and greenery, can help outdoor spaces feel more connected and relaxing. Let’s explore designs you can adapt to your own backyard.
Natural Stone Shower
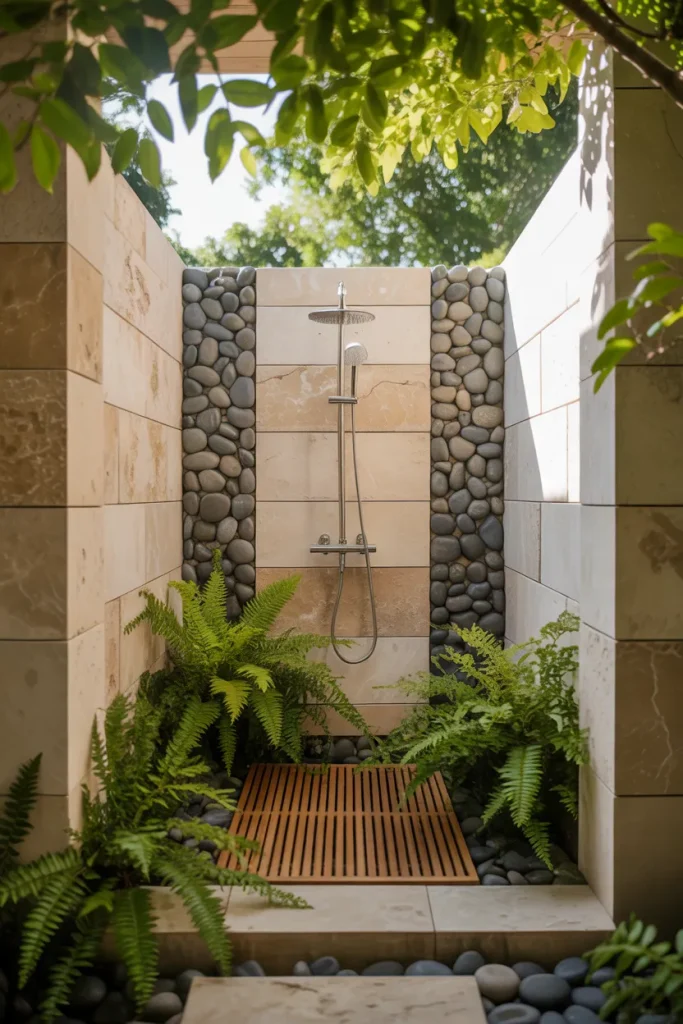
Natural stone brings a peaceful, spa-like feeling to an outdoor shower without making the backyard look overly designed. Choose limestone, slate, or textured stone tiles in earthy shades to create a beautiful enclosure that blends with the garden.
For a cohesive finish, pair the stone walls with brushed brass fixtures and a simple wooden bench. A slatted teak floor adds warmth underfoot while allowing water to drain properly. Keep the surrounding plants simple so the stone remains the main attraction.
In my experience, choosing materials that complement your existing patio or garden makes an outdoor shower feel like a natural extension of your home rather than a separate structure.
Wooden Privacy Screen
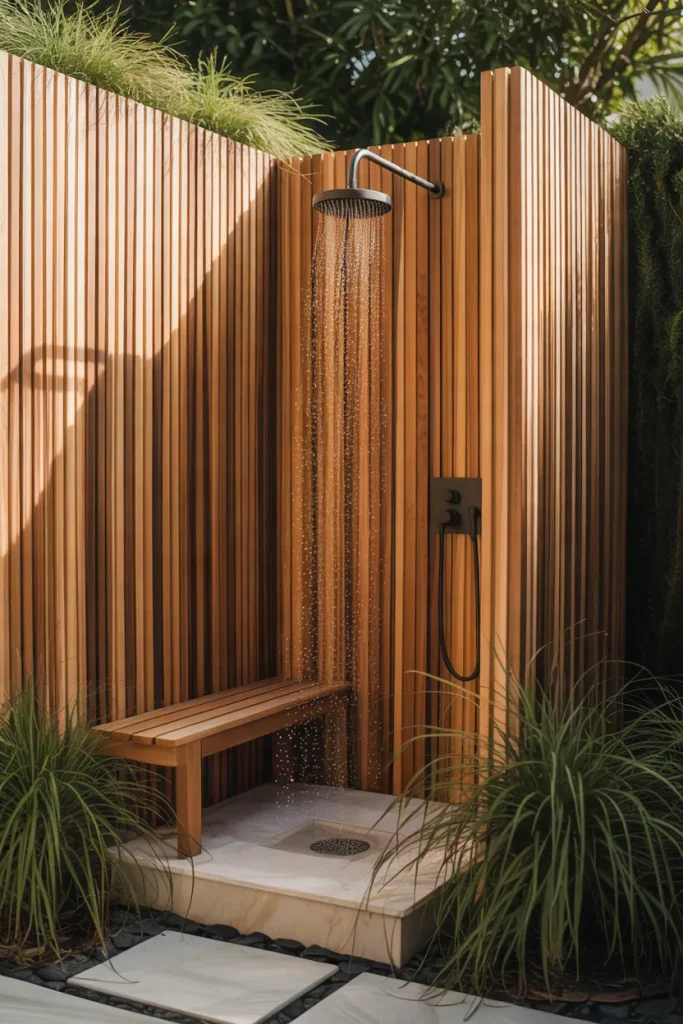
A wooden privacy screen gives your outdoor shower a warm, natural appearance while helping create a more secluded place to rinse off. Vertical cedar or redwood slats look especially attractive against green landscaping and neutral stone.
- Choose durable wood: Cedar and redwood naturally resist moisture better than many untreated woods.
- Leave small gaps: Spacing between slats allows airflow while maintaining privacy.
- Add a shower bench: A compact teak bench provides space for towels and toiletries.
- Protect the finish: Use an appropriate exterior-grade finish and follow maintenance recommendations.
- Plan the drainage: Direct wastewater toward an approved drainage system rather than allowing it to collect around the wood.
This design works beautifully beside a swimming pool, garden patio, or back door. For better privacy, use closer slat spacing or add a solid panel at the most exposed side.
Tropical Garden Shower
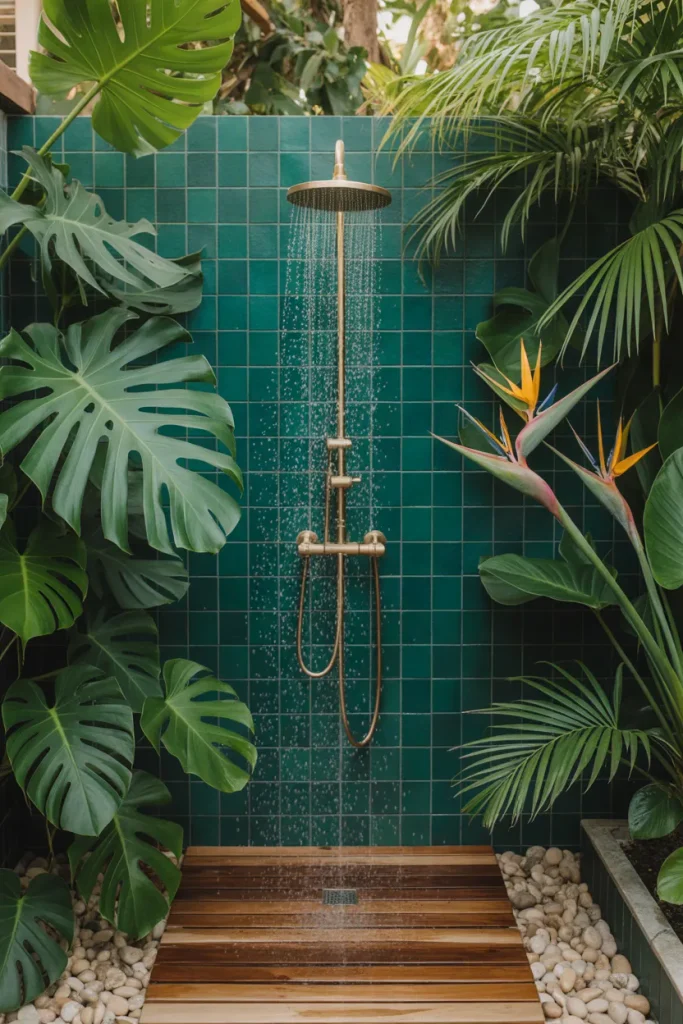
Bring a vacation-inspired atmosphere into your backyard with a shower surrounded by tropical foliage. Large leafy plants create a lush green backdrop, while natural wood and warm metal fixtures add the finishing touches.
Quick Tip:
Choose plants suited to your local climate and the amount of sunlight your shower receives. Keep foliage away from the showerhead, drainage area, and walking path to prevent blocked water flow and slippery surfaces.
For a layered look, place taller palms or banana plants behind the enclosure, then position ferns and ornamental grasses around the edges. If your backyard gets cold winters, use movable containers for tropical plants that need protection. The result is a refreshing garden retreat that feels private without requiring a fully enclosed structure.
Rustic Farmhouse Shower
BEFORE
A plain backyard corner can feel exposed and disconnected from the rest of your outdoor space. Basic plumbing and mismatched materials may also make the shower look unfinished.
AFTER
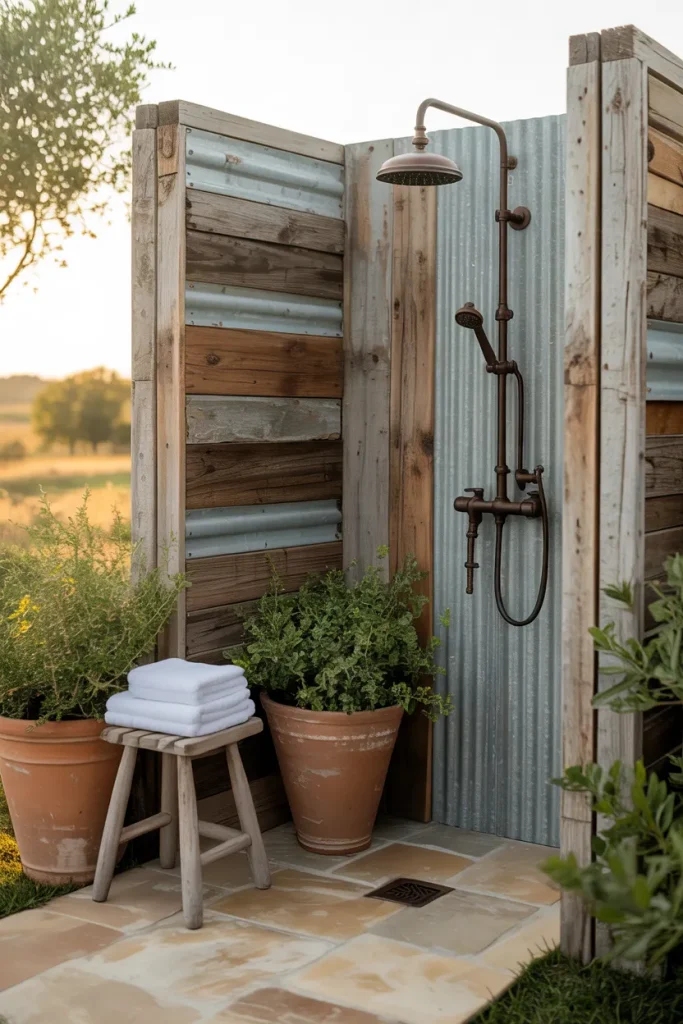
Reclaimed wood panels, dark metal fixtures, and earthy accessories create a cohesive farmhouse look. A simple enclosure adds privacy while making the shower feel like an intentional part of the garden.
For an authentic finish, choose weather-resistant wood with visible grain and natural imperfections. Add a small shelf for soap and a hook for towels. Keep the floor slip-resistant and ensure wastewater drains correctly. This rustic design works especially well beside a wooden deck, country-style home, or cottage garden.
Minimalist Concrete Shower
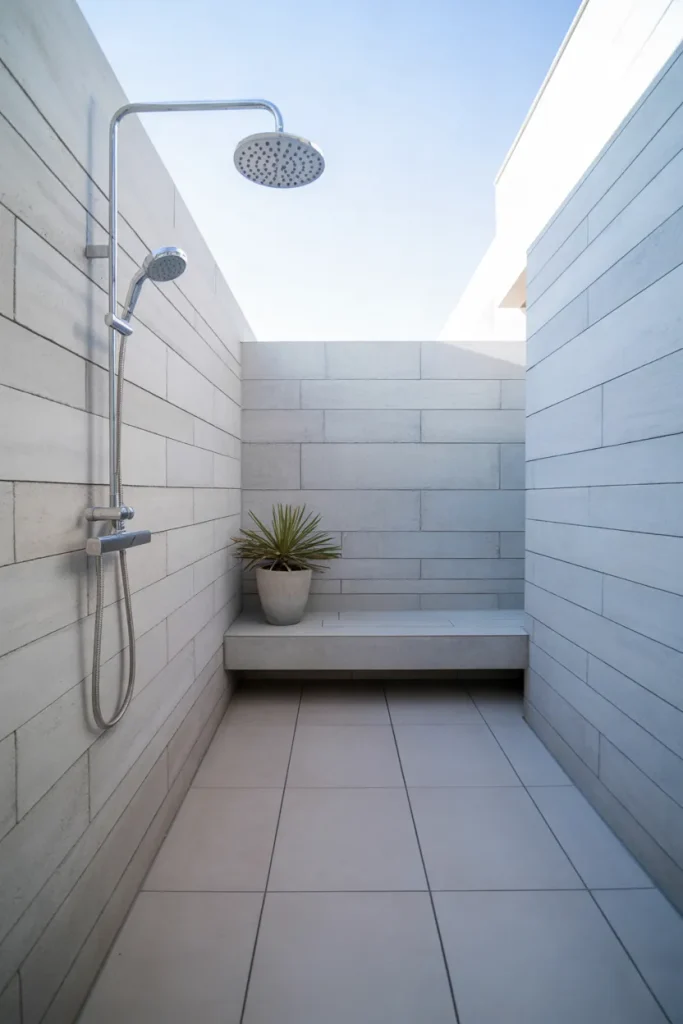
Clean lines and simple materials make a concrete shower feel modern without requiring decorative extras. The secret is choosing a restrained color palette and paying attention to the details.
- Build the enclosure: Use properly finished concrete or suitable exterior-rated concrete-look panels.
- Choose simple fixtures: Install a streamlined stainless steel or matte black showerhead.
- Select safe flooring: Use textured, slip-resistant outdoor tiles with appropriate drainage.
- Add one accent: Include a small bench or planter to soften the hard surfaces.
A concrete enclosure pairs beautifully with contemporary homes, gravel paths, and minimalist landscaping. For comfort, consider a privacy wall that blocks neighboring views without closing off the entire space. Have waterproofing, plumbing, and drainage installed correctly to prevent moisture damage and standing water.
Poolside Rinse Station
| Feature | Option A: Open Shower | Option B: Screened Shower |
|---|---|---|
| Privacy | Minimal | Better privacy |
| Space | Needs less room | Requires extra space |
| Appearance | Clean and simple | More architectural |
| Best use | Quick pool rinses | Rinsing and changing |
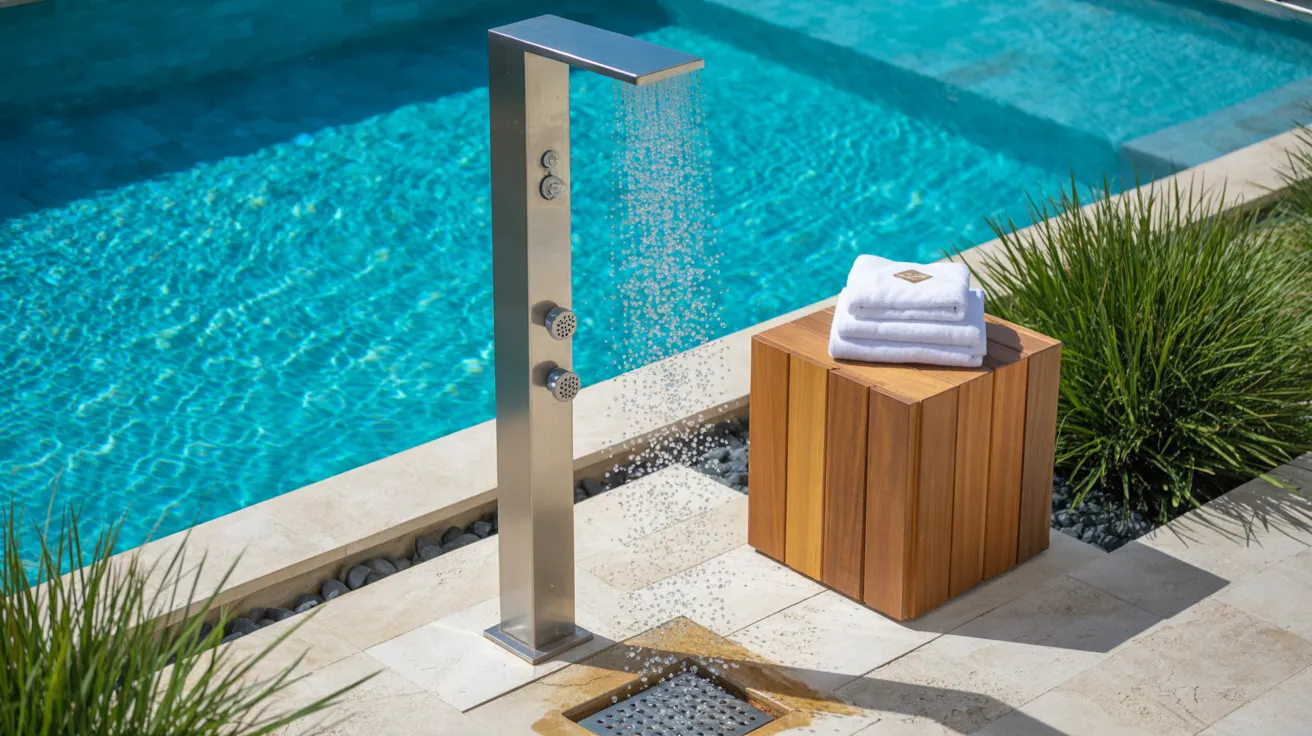
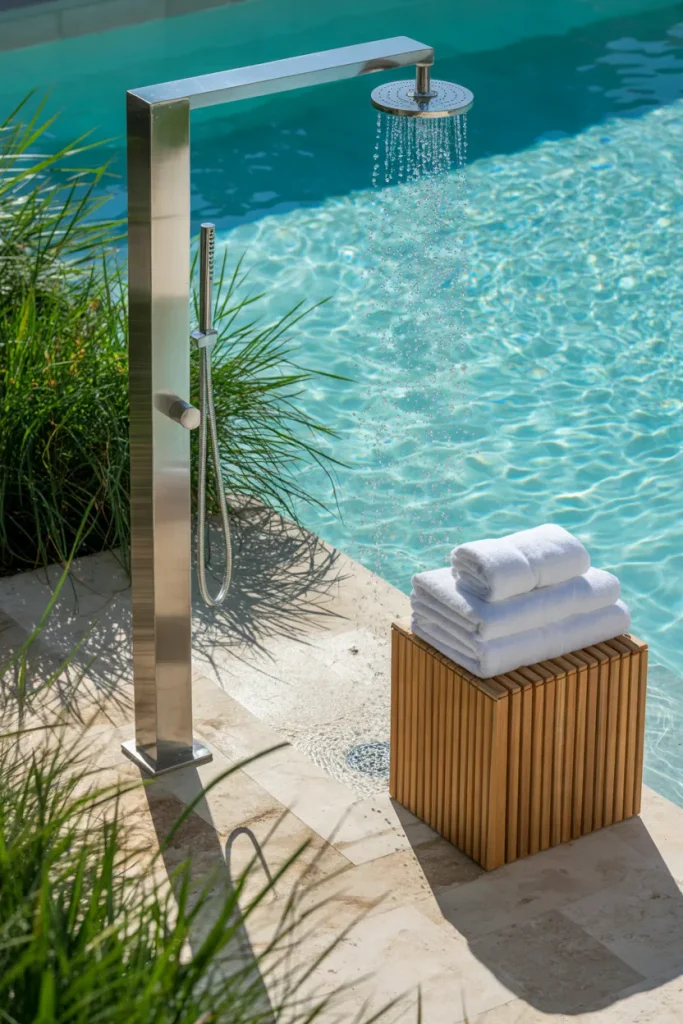
A dedicated rinse station keeps pool water, sunscreen, and grass clippings from being tracked indoors. Position it close to the pool entrance so swimmers can rinse before entering the house.
Choose corrosion-resistant fixtures and flooring designed for wet outdoor areas. A small slatted screen can hide the plumbing and provide a convenient place to hang towels. If the shower uses pool water or connects to household plumbing, confirm the appropriate water supply, backflow protection, and drainage requirements with a qualified professional.
Budget-Friendly DIY Shower
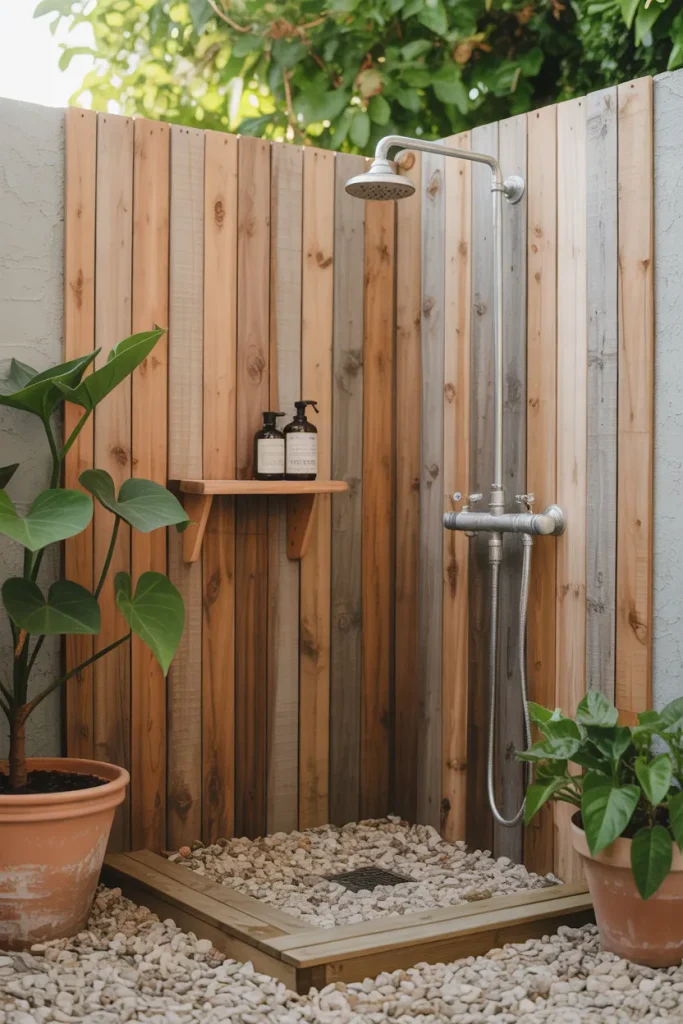
A refreshing outdoor shower doesn’t need an expensive renovation to look inviting. With a simple layout, affordable materials, and a little planning, you can create a practical washing area that suits your backyard and budget.
DO
- Choose a straightforward design with minimal decorative details.
- Use gravel only where it provides suitable drainage and a stable, safe walking surface.
- Repurpose weather-resistant wood for a privacy screen.
- Compare plumbing fixture prices before purchasing materials.
DON’T
- Use untreated wood in constantly wet areas.
- Assume a garden hose connection is suitable for every shower setup.
- Allow soapy water to flow into areas where it can damage plants.
- Skip waterproofing or proper drainage to save money.
Start by deciding where the water will come from and where it will drain. Then build around those practical requirements. A neat screen, a sturdy hook, and a simple shelf can make an inexpensive setup feel thoughtfully finished.
Freestanding Outdoor Shower
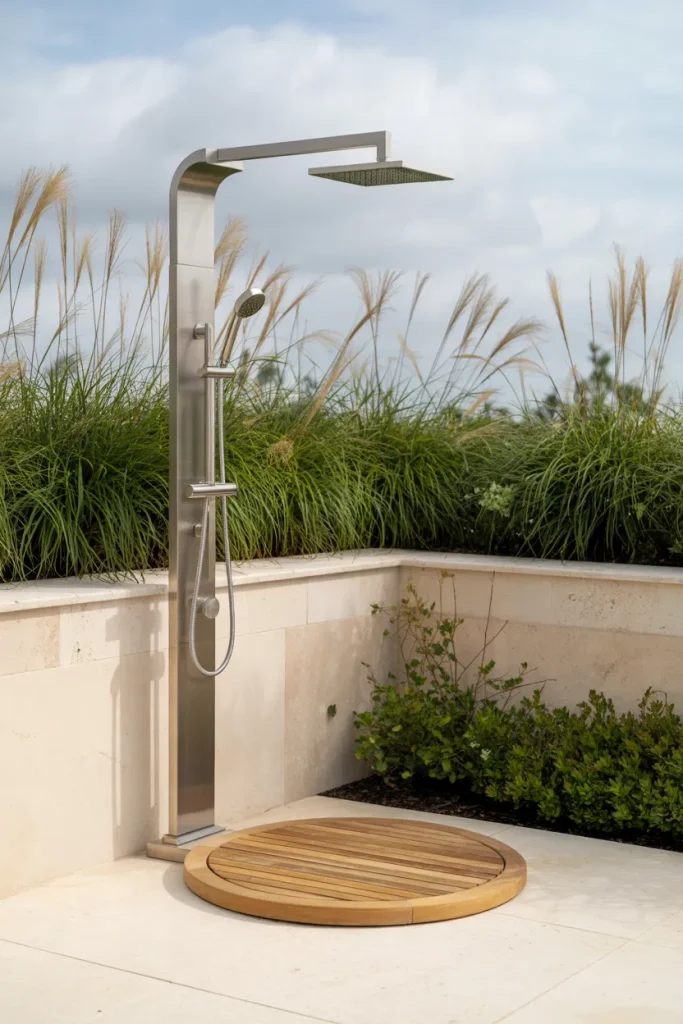
Cost: Varies by plumbing, fixture, and installation requirements.
Time: Installation may take several hours to several days, depending on site preparation.
Skill Level: Beginner-friendly for selecting the design; plumbing installation may require a professional.
Best For: Small patios, poolside areas, and open garden spaces.
Result: A streamlined shower with a compact footprint.
A freestanding shower column keeps the design visually light because it doesn’t require a bulky enclosure. Position it near an existing water supply to potentially reduce plumbing work, but confirm that the location also allows suitable drainage and privacy. A stone or concrete base gives the fixture a stable foundation, while nearby planters soften the overall appearance. Choose a model rated for outdoor exposure and protect its plumbing against freezing if your climate requires it.
Enclosed Bamboo Shower
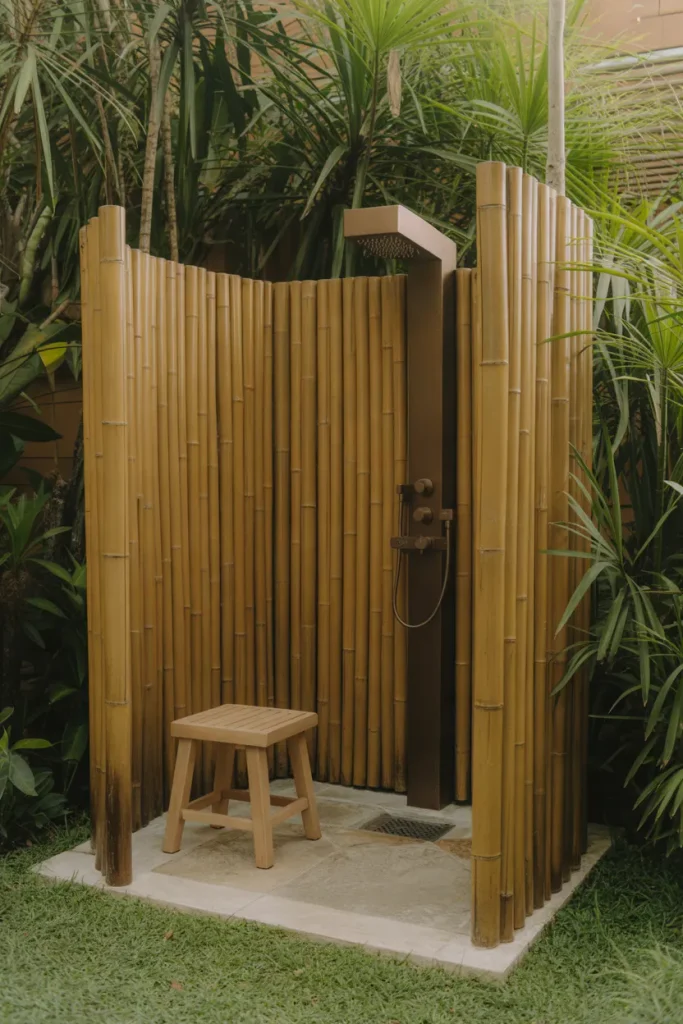
Bamboo screening brings natural texture and a relaxed, tropical character to an outdoor shower. Its warm color contrasts beautifully with green plants, pale stone, and dark metal fixtures.
For a practical installation, select bamboo screening specifically suited to outdoor conditions and moisture exposure. Secure it to a sturdy frame instead of relying on loosely tied poles. Keep the lower edges away from constantly wet soil, and leave enough airflow to help the material dry.
A screened enclosure is especially useful when neighboring windows overlook your yard. You can increase privacy by overlapping the bamboo or adding a solid panel behind the showerhead. Pair the enclosure with a slip-resistant floor and a properly designed drainage system to keep the space comfortable and safe.
Vintage Copper Shower
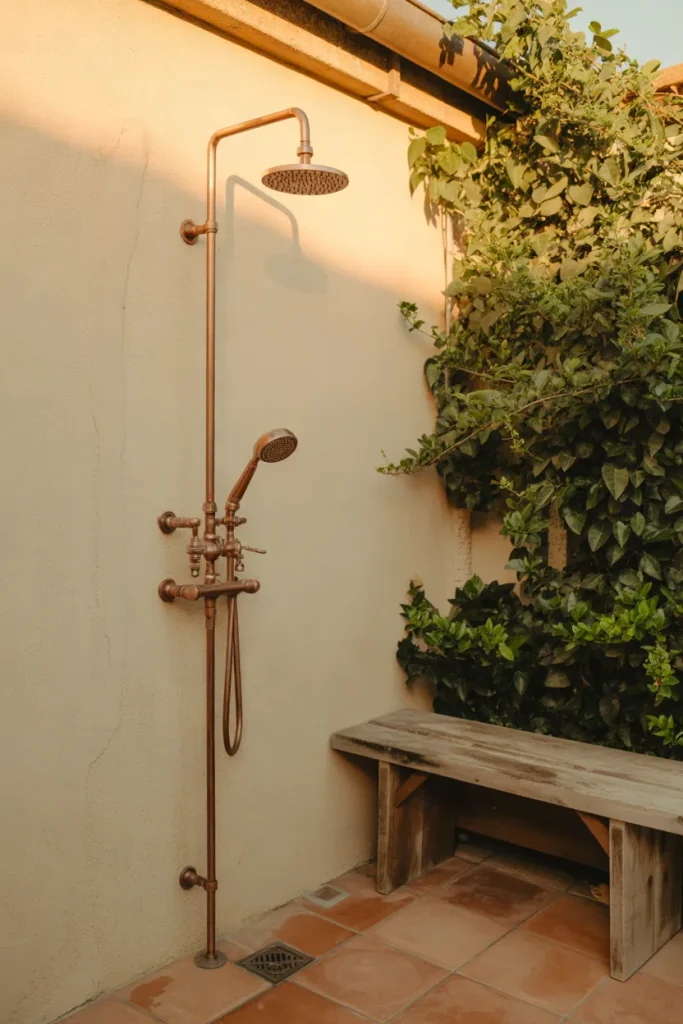
- Choose the focal point: Install a copper-finish shower fixture with a classic exposed-pipe design.
- Add warm materials: Pair the metal with terracotta tiles, reclaimed wood, or natural stone.
- Keep accessories simple: Use a small wooden stool and a traditional wall hook.
- Plan for weather: Select fixtures rated for outdoor use and follow the manufacturer’s maintenance instructions.
A vintage copper finish gives a backyard shower an aged, character-filled appearance without needing elaborate decoration. For a cohesive look, repeat copper tones in a nearby planter or outdoor light fixture. Remember that real copper develops a patina over time, while copper-colored finishes may weather differently. Choose based on the maintenance and appearance you prefer.
Rainfall Shower Retreat
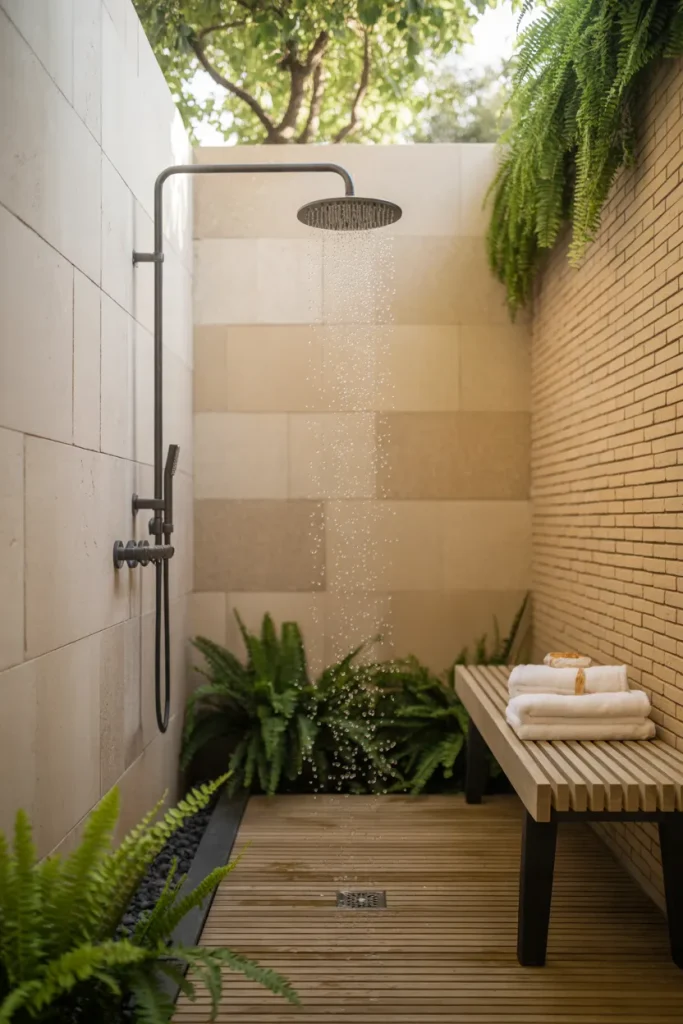
Quick Tip:
Choose a rainfall showerhead with a flow rate that suits your water pressure and available hot-water supply. An oversized fixture may use more water or feel disappointing if the pressure is insufficient.
For the most comfortable setup, position the showerhead high enough for the tallest household member while keeping the controls easy to reach. A textured stone or porcelain floor adds visual warmth without competing with the overhead fixture. You can also install a simple privacy wall behind the shower to protect the space from neighboring views. The result is a calm outdoor retreat designed around a comfortable, refreshing rinse.
Enclosed Garden Nook
BEFORE
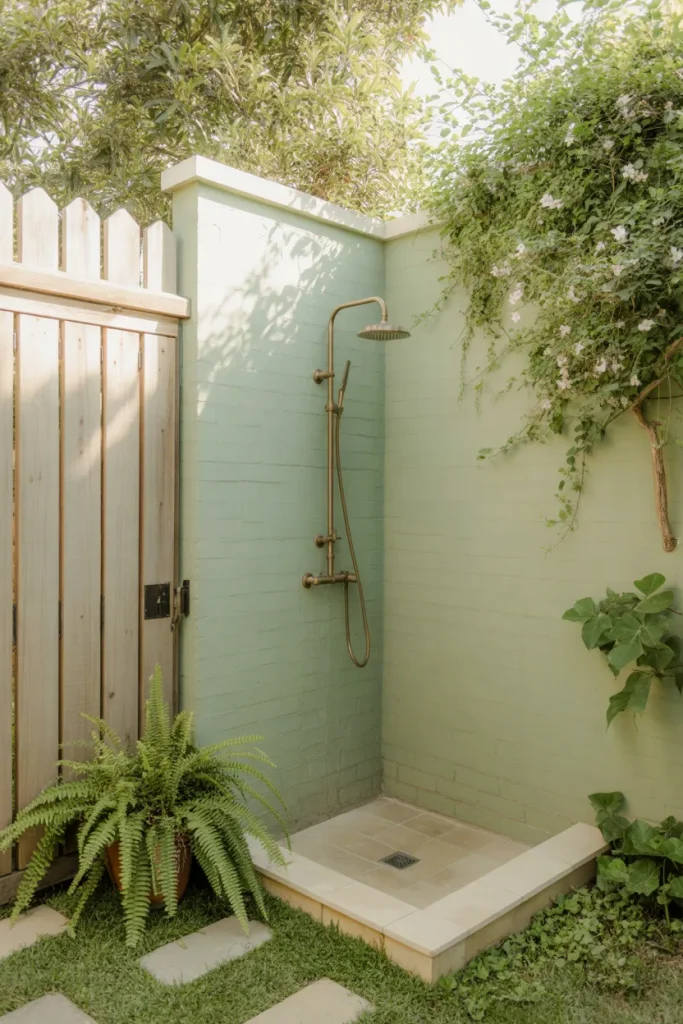
An unused backyard corner often becomes a storage spot for pots, hoses, and gardening tools. Without a clear purpose, the area may feel cluttered and disconnected from the garden.
AFTER
A compact shower enclosure gives the corner a practical function while creating a private outdoor washing space. A gate, a few plants, and coordinated materials make it feel intentional.
Start by checking the available space, existing water connections, and drainage options. Place the shower controls where they are accessible without stepping into the spray, and leave enough room to move safely. Climbing plants can soften the walls, but keep roots, vines, and damp foliage away from plumbing and surfaces that need regular maintenance. This layout makes especially good use of a sheltered corner beside a patio or garden path.
Portable Outdoor Shower
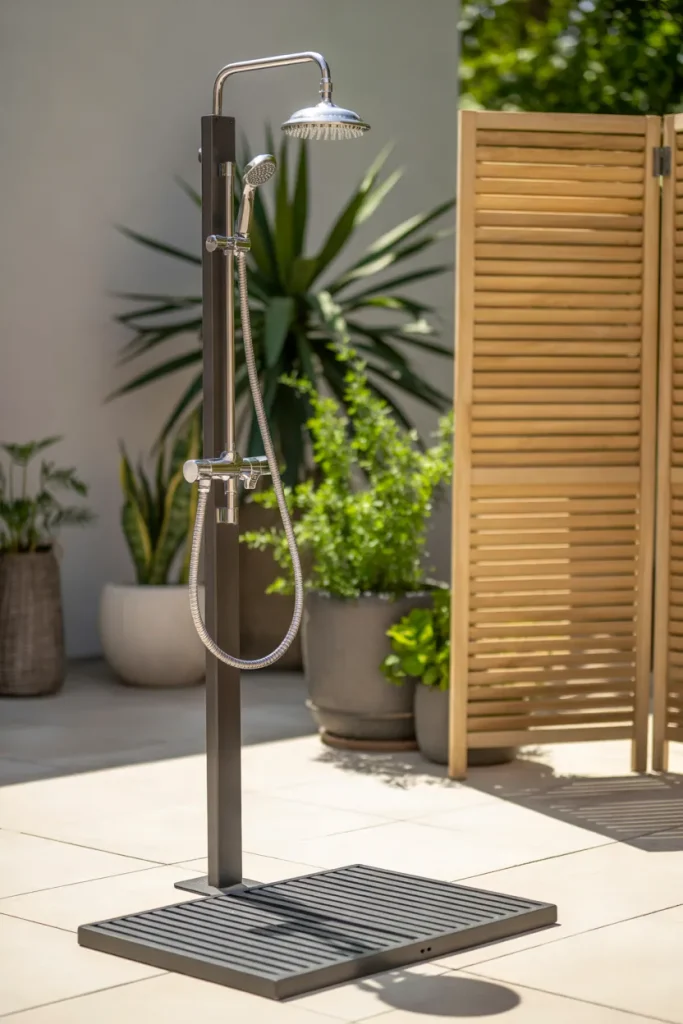
A portable shower offers flexibility when you don’t want to commit to a permanent backyard installation. It’s useful for renters, campers, and homeowners who need an occasional rinse after gardening, swimming, or outdoor activities.
- Choose the shower type: Compare battery-powered, gravity-fed, and hose-connected models based on your water access.
- Select a stable location: Use a level patio or another suitable surface that can handle water safely.
- Add temporary privacy: Position a freestanding screen around the washing area.
- Plan wastewater disposal: Follow local requirements and the manufacturer’s instructions for collecting or directing used water.
Keep the setup simple with a removable floor mat and a compact storage hook. Before using a portable unit, confirm that its water temperature controls are suitable for your needs. Never assume a basic portable model provides reliable temperature regulation or adequate pressure.

| Feature | Option A: Natural Stone | Option B: Stone-Look Tile |
|---|---|---|
| Appearance | Unique, organic texture | More uniform finish |
| Maintenance | Depends on stone type and sealing | Depends on tile and grout |
| Installation | Often more labor-intensive | Varies by tile and substrate |
| Best For | Rustic, natural settings | Modern or traditional designs |
A stone wall creates a strong visual backdrop and helps an outdoor shower feel connected to the surrounding landscape. Natural variations in color and texture add character, while matching stone paving creates a cohesive finish.
Before choosing your materials, confirm that they are suitable for wet outdoor conditions. Some natural stones require sealing, and rough surfaces can collect dirt or algae. Use properly waterproofed construction behind the shower and a slip-resistant floor beneath it. A simple metal fixture and wooden bench provide enough contrast without distracting from the masonry.
DO
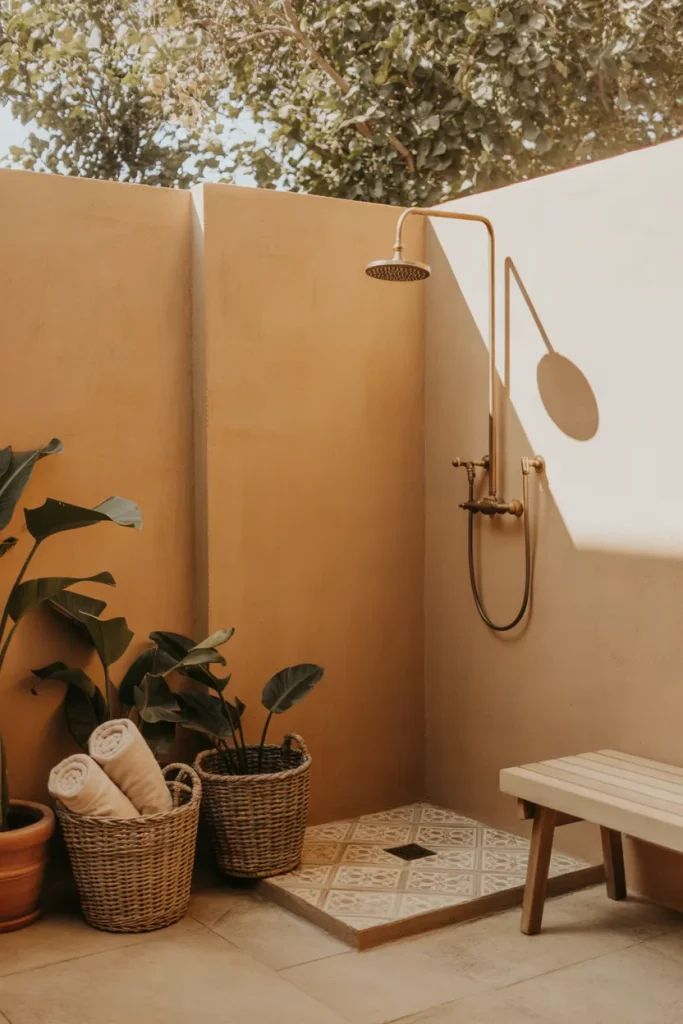
- Combine earthy shades such as terracotta, cream, olive, and sand.
- Choose patterned tiles rated for outdoor wet areas.
- Add a weather-resistant wooden bench for practical storage.
- Use simple planters to introduce natural texture.
DON’T
- Overcrowd the shower with accessories that obstruct movement.
- Place absorbent rugs where they stay damp.
- Use decorative lighting that isn’t rated for wet locations.
- Ignore drainage while choosing attractive flooring.
Bohemian styling works best when a few distinctive details do the decorating. Let patterned flooring or a colorful wall become the main feature, then keep the remaining surfaces relatively simple. A brass-tone fixture and a couple of plants can tie everything together. Choose accessories that can dry quickly or be stored indoors between uses, especially in humid climates.
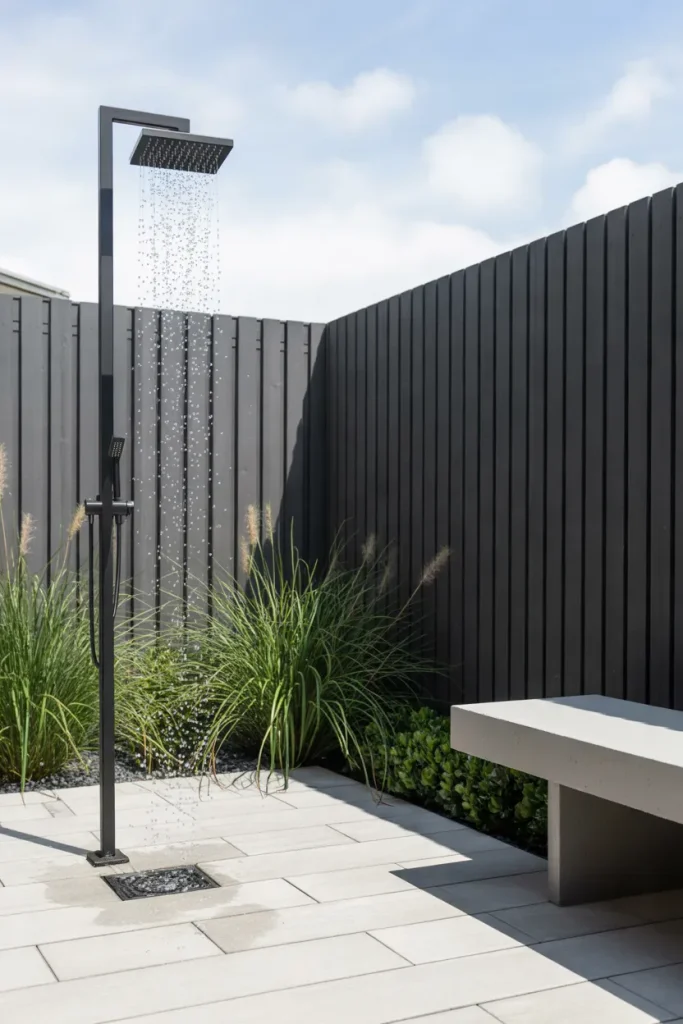
Cost: Moderate to high, depending on materials and plumbing.
Time: Several days to a few weeks for a permanent installation.
Skill Level: Intermediate for planning; professional installation is recommended for complex plumbing.
Best For: Contemporary homes, minimalist patios, and modern pool areas.
Result: A bold, coordinated outdoor shower with clean architectural lines.
Matte black fixtures stand out against pale stone, concrete, and greenery, making them an effective focal point in a modern backyard. Repeat the black finish in the privacy screen or nearby planters for a balanced design. Choose exterior-rated materials that can withstand moisture and temperature changes. Before installation, check the fixture manufacturer’s cleaning instructions because some black finishes can show mineral deposits or suffer damage from abrasive cleaners.
Pergola Covered Shower
A pergola gives an outdoor shower a defined structure while allowing sunlight and fresh air to move through the space. The overhead beams also create attractive lines that make the shower feel like part of a thoughtfully designed outdoor living area.
For a practical layout, position the shower beneath the pergola and add a privacy screen along the most exposed side. Use weather-resistant timber or another suitable outdoor material, and ensure the structure is securely anchored. Keep climbing plants away from plumbing connections and allow enough clearance for maintenance. A pergola provides limited privacy on its own, so consider the surrounding sightlines before deciding whether additional walls are necessary.
Pebble Floor Shower

| Feature | Option A: Natural Pebbles | Option B: Textured Porcelain |
|---|---|---|
| Texture | Organic and irregular | Consistent and controlled |
| Cleaning | Grout and gaps need attention | Often easier with suitable grout |
| Foot Feel | Uneven underfoot | Available in varied textures |
| Maintenance | Depends on sealing and installation | Depends on tile and grout |
| Best For | Natural spa-inspired designs | Practical, streamlined showers |
Pebble flooring adds an earthy, nature-inspired finish that contrasts beautifully with smooth shower walls. Choose carefully graded stones and a professionally installed surface to avoid sharp edges, unstable pieces, or uncomfortable footing.
Drainage matters just as much as appearance. The floor needs a suitable slope toward the drain, and the pebble installation must be compatible with the waterproofing system underneath. If easier cleaning and a more even walking surface are priorities, textured porcelain tile with a pebble pattern may provide a practical alternative.
Small Patio Shower
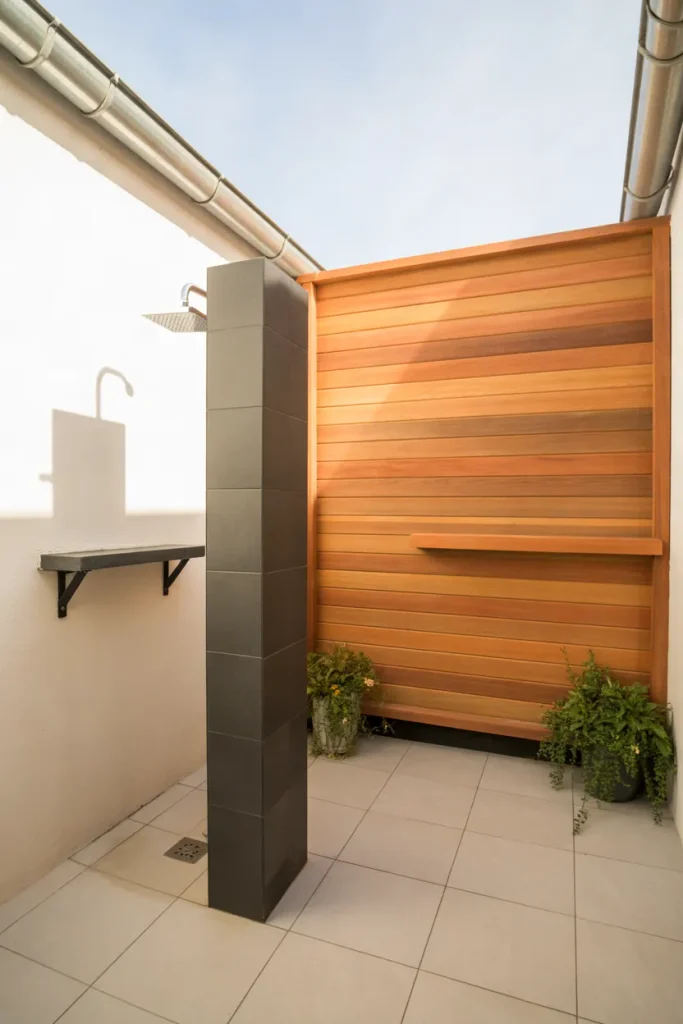
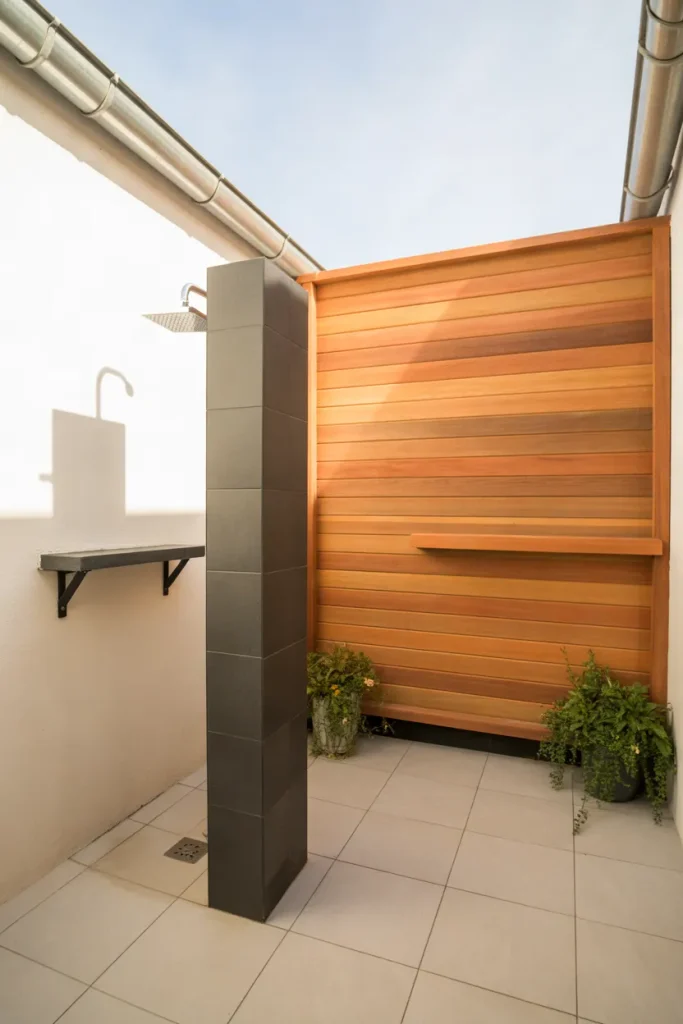
Even a small patio can accommodate a practical outdoor shower when every element has a purpose. A slim shower column and a single privacy panel help keep the layout open without making the area feel cramped.
- Measure first: Check the available width, clearance, and access before buying fixtures.
- Use vertical space: Install sturdy hooks and a compact shelf for towels and toiletries.
- Choose light finishes: Pale stone and natural wood can make a small area feel more open.
- Keep the floor clear: Avoid bulky benches and oversized planters that obstruct movement.
- Plan drainage carefully: Prevent water from pooling on the patio or flowing toward the house.
For the best result, place the shower near an existing suitable water connection while maintaining a safe route for wastewater. A compact, well-planned design can be more useful than a larger enclosure filled with unnecessary accessories.
Quick Tip:
Position the bench outside the direct shower spray when possible, and choose a material designed for repeated outdoor moisture exposure. Keep the seat stable and provide enough room to stand, turn, and reach the controls safely.
A bench makes an outdoor shower more comfortable for washing sandy feet, rinsing gardening tools, or keeping toiletries within reach. Teak and other suitable outdoor materials bring warmth, while a built-in masonry seat can create a more permanent architectural finish. Make sure the seat drains and dries properly rather than trapping water against the wall. A small ledge beside the bench can hold soap, but avoid placing bottles where they could fall onto the walking surface.
Mediterranean Courtyard Shower
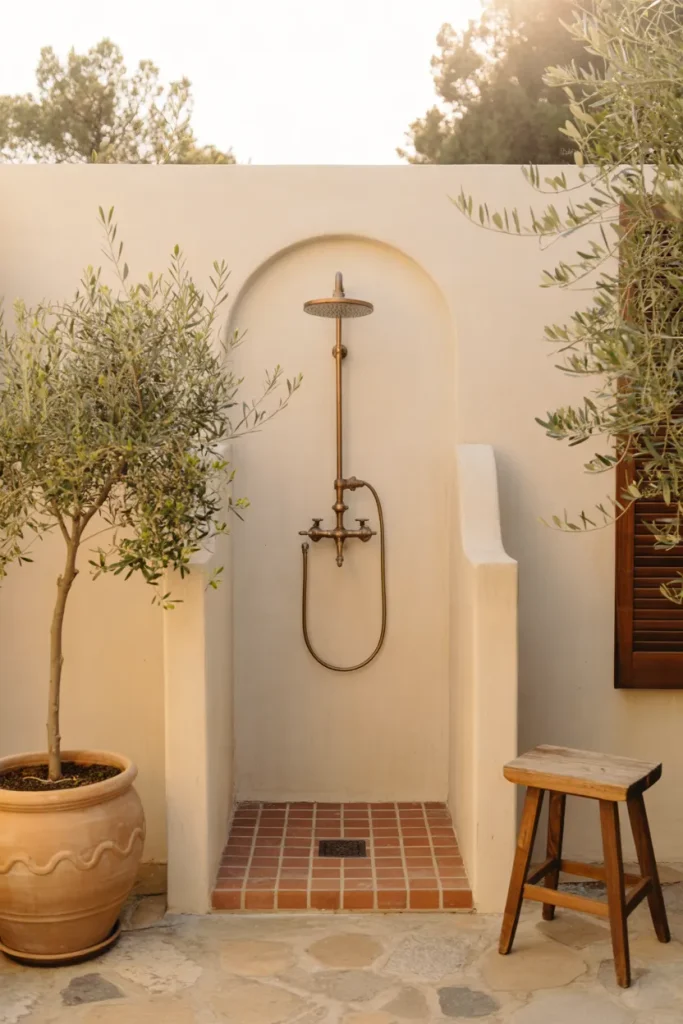
Mediterranean details bring warmth and old-world character to an outdoor shower through earthy colors, textured walls, and traditional materials. Start with an ivory or sand-colored backdrop, then introduce terracotta, natural stone, and brass-tone fixtures.
A shallow arch or curved privacy wall can add architectural interest without requiring elaborate decoration. Place clay pots around the edges, leaving the walking area clear and ensuring water cannot collect beneath them. Choose outdoor-rated tiles with suitable slip resistance, and confirm that the wall finish can withstand repeated moisture. This style works especially well in sunny backyards with gravel paths, stone patios, and drought-tolerant planting.
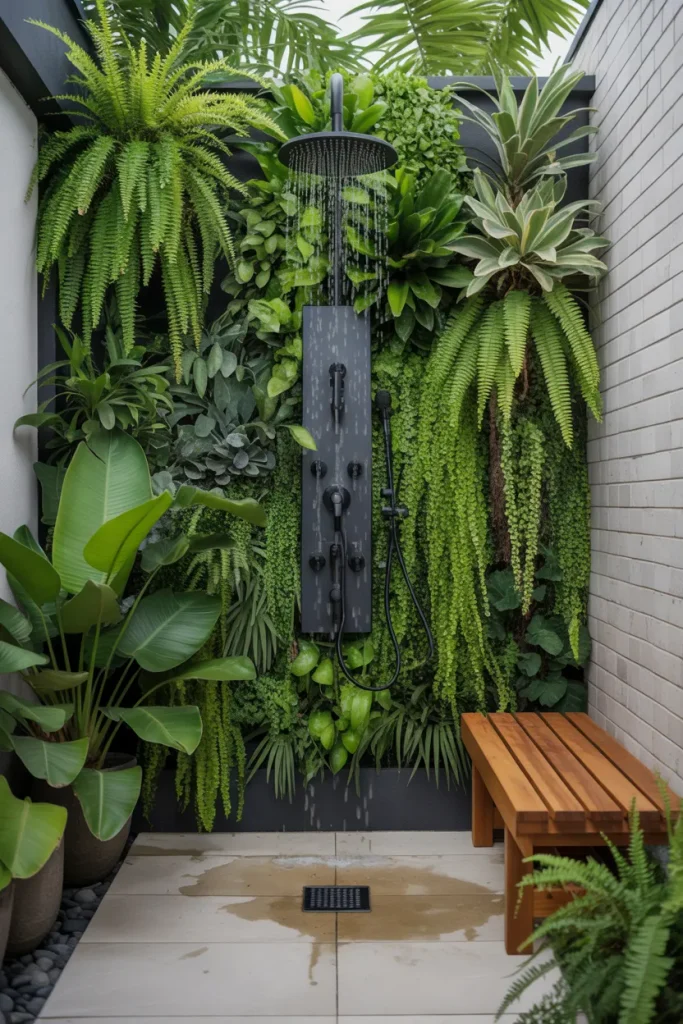
A living wall brings a lush, refreshing atmosphere to an outdoor shower without taking up much ground space. It works especially well in compact backyards where vertical greenery adds privacy and visual interest.
Choose moisture-tolerant plants suited to your local climate, sunlight, and watering conditions. Install the greenery on a properly supported system with suitable drainage and a moisture barrier to protect the wall behind it. Keep plants away from shower controls and plumbing access points so maintenance remains simple.
Pair the green backdrop with neutral stone, natural wood, and understated fixtures. The contrast creates a calming outdoor retreat while making a plain wall feel like a garden feature. Before installation, confirm that the wall can support the system’s weight when wet.
Conclusion
Creating an outdoor shower is a wonderful way to make your backyard more functional, relaxing, and visually appealing. From rustic wooden screens and natural stone walls to compact patio setups and tropical garden retreats, these ideas offer inspiration for different styles, spaces, and budgets.
Start with one design that suits your needs, then focus on privacy, comfortable flooring, weather-resistant materials, and proper drainage. Small details can make the space feel thoughtfully finished without requiring a major renovation.
Save this article on Pinterest to revisit your favorite designs, try an idea that inspires you, and share this guide with anyone planning a backyard refresh. Your outdoor retreat can start with one simple step.